Saturday, 13 June 2015

#39 - Honey Lemonade Popsicles

Yum

Just what I need to beat the heat outside! Are you frustrated with the recent hot weather like I am? I am sure we are all craving for something cold, cooling and yummy to bring the heat down a little. Try this! This is one of my favourite popsicle flavour so far. Sweet & tangy all at the same time! 


My hubby loves this recipe so much that he is constantly bugging me to make more these beautiful little things. The only thing he hates about them is the waiting time. Having to wait overnight while they freeze up is such a torture. What can I say? Good things are worth waiting for, aren't they?


The best part of this popsicle is that you are not restricted by the choice of fruits. You do not have to use the fruits I recommended. You may replace it with other fruits that you preferred (eg. oranges, peaches, mangoes etc). It is the magical blend between the honey and the lemonade that gives you the sweet yet tangy taste that is so addictive! 

I am so heading into my kitchen and making another batch of this NOW!  

***************

Recipe: Adapted and modified from here

Servings
6 Popsicles (depending on size of the mould)

Ingredients
3/4 cups Water
4 Tbsp Honey
1/2 cup Lemon Juice
Zest of 2 Lemons
1 Kiwi, sliced
2 - 4 Strawberries, sliced
12 Blueberries

Method
1. Combine water, honey, lemon juice and lemon zest in a liquid measuring cup. Stir well to ensure that the honey is fully dissolved into the lemonade. 


2. Distribute the fruits (kiwi, strawberries and blueberries) among the popsicles moulds. 


3. Pour lemonade mixture into the popsicles moulds. 


4. Freeze popsicles for at least 6 hours (or overnight) until the popsicles are firm. 

5. To remove popsicles from their moulds, dip moulds in glass of water for 10 seconds. This will ensure the popsicles come out smoothly from the moulds. Serve while popsicles are firm. 


Monday, 8 June 2015

#38 - Nutella Cupcakes with Marshmallow Frosting

Yum


It is the strawberries season lately and these pretty red beauties are really big, juicy and sweet at this time of the year! Don't they just look really gorgeous? Such vibrant colours and sweet flavour are just perfect as gifts to friends.


As for the cake base, this is probably one of the most tasty yet simplest cake base I have made among all other cupcakes. With just 3 basic ingredients, you get a rich, moist and fudgy nutella cake base that is most certain to wow your mind. How delightful is that! 


As if this wasn't enough, the absolute reason why I love this recipe is because of the  … FROSTING. 

Couple of months back, I learnt this trick from a fellow baker and ever since then, I have fallen in love with it. This trick does not require you to go through the whole process of whipping up the cream with powdered sugar to get a firm icing (which we all know can be challenging at times if your cream is not at the right temperature or fats content). Let's be honest, even if you are a seasoned cupcakes decorating professional, you wouldn't turn down a trick like this where you are have a perfectly pretty looking cupcake without going through the hassle of frosting. Would you? The magic is just to make use of toasted marshmallows instead. Not only do they look like actual frosting (and hence, making the cupcakes looking close to perfection),  the toasted marshmallows are pretty yummy too! 


As for the toppings of the cupcakes, you can make use of any fruits you like (e.g. strawberries, blueberries) or even chocolate balls. As long as they are yummy, anything goes! 


***************

Recipe: Adapted & modified from here.

Servings
10 cupcakes

Ingredients
100g Self Raising Flour, sifted
2 Eggs
375g Nutella

(Optional)
Nuts, chopped (eg. macadamia, almond or hazelnuts)

Method
1. Preheat oven to 180C.

2. Line muffin tray with paper liners and set aside for later use.

3. Combine all ingredients together and mix well until batter is smooth. Do not over mix.

4. Using an ice-cream scoop, divide the batter evenly into muffins tray (with paper liners) prepared. Each muffin cup should be filled up to 1/2 to 2/3 of the way.

5. Tap muffin tray on tabletop gently to ensure that the batter is level and evenly spread out. This also help to make sure that any excess air is removed from the batter.

6. If you would like to, sprinkle chopped nuts on the batter before baking it.


7. Bake for 20 - 22 minutes until top of the cupcakes are firm. Remove from oven.


8. Top each cupcake with a marshmallow and return tray back to oven to toast it for 2 - 3 minutes until marshmallow is melted. 


9. Lastly, remove cupcakes from oven and top with a strawberry before transferring to wire rack to allow cupcakes to cool completely before serving.


Friday, 5 June 2015

#37 - Cheesy Chicken Baked Rice

Yum

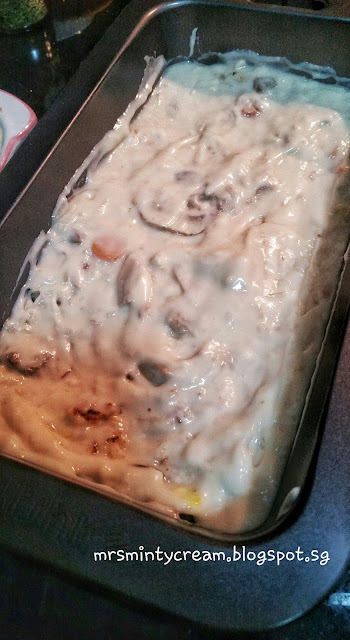
Cheesy Chicken Baked Rice, definitely a go-to recipe for me and my family. Hubby and I love this dish so much that it is probably the most cooked dinner item for us at home. This is also something I like to cook for Hubby when I know he had a tough week at work. The perfect reward for him just because I know how much he love this baked rice! Trust me, this dish is THAT simple and THAT good!

To be honest, there is really no ways you can get this recipe wrong in the kitchen. I have cooked this dish numerous times for family gatherings, home dinners, pot-luck parties and even taught a few friends how to cook it. So far, every single person who have tried this, love it and they always come back, looking for more. I am so grateful to have this fool-proof recipe! 


I have a similar recipe on Chicken & Mushroom Baked Rice which I shared on this site couple of years back and this new version is basically an improved version with more vegetables. Even so, it still comes with the same old goodness packed in it. If you would like to, you may also replaced the protein in the recipe with salmon, grilled fish, pork, seafood or basically anything to your liking.

On that note, I will be doing a vegetarian version very soon. Stay tuned! 


***************

Recipe: Adapted & modified from here.

Servings
Serves 3 - 4

Ingredients
1 and 1/2 cup uncooked rice
1 and 1/2 cup of water (to cook the rice)
2 tbs Olive oil
90g Swiss Brown Mushroom, sliced
170g Chicken Fillet, cubed
50g Baby Carrots, cubed
50g Cherry Tomatoes, cubes
50g Mixed Vegetables
Salt & Black Pepper, to taste
1 can Campbell's Cream of Mushroom Soup
150g Shredded Cheese (Mozzarella, Cheddar, Parmesan)


Directions

1. Preheat oven at 200C.

2. Rinse and drained the uncooked rice. Set aside for later use. 

3. In a saucepan, add the olive oil. Once the saucepan is heated, add in the sliced mushroom followed by the chicken pieces. Stir-fry over medium-low heat until the chicken is semi-cooked with a white surface. Do not overcook the chicken to ensure that the meat will not end up too tough. 


4. Add the washed uncooked rice, followed by the carrots, tomatoes and mixed vegetables into the saucepan and continue frying and tossing. Season the mixture with salt and pepper. Ensure that the content is well-stirred.


5. Transfer the fried rice into a rice cooker and add in water to cook the rice.


6. After the rice is cooked, portion the content into your casserole dishes or baking pan. Pour the Cream of Mushroom Soup sauce over the top of the rice. Spread the sauce evenly across the surface.


7. Top the sauce with a layer of shredded cheese.


8. Bake in the oven for 16 - 18 minutes, or until the cheese has melted and give a golden brown crust at the top of the baked rice. Serve while it is hot. 


Thank you

Yum

Just want to say thank you to all of you who have been visiting my site and also to those who have LIKED my facebook page. It means a lot to me for the page to hit 350 likes in less than 2 months. I hope you find some good recipes shared here.

Recipes sharing can be abit slow on days when I am tied up with work and I really appreciate your understanding on that. I will work hard to make more yummy food and share them with you!

Please feel free to share my page/site with your friends. Thanks to those who already did. Sharing is caring!

Site - http://mrsmintycream.blogspot.sg
Page - http://facebook.com/mrsmintycream
Related Posts Plugin for WordPress, Blogger...