Showing posts with label Cheesecake. Show all posts

Wednesday, 21 January 2015

#25 - Butter Chocolate Cheese Cake

Yum

If you have not noticed, the recipe for this Butter Chocolate Cheese Cake was spreading like wild fire in many of the cooking/baking groups on Facebook. For weeks, I see posts after posts on various variations of this same recipe going around. Such a beautiful sight. Some bakers did it in square baking pan (like I did), some did the cupcakes version and some bakers even added their own touch to it by doing different ganaches and toppings to the cake. This is also a great recipe for a basic chocolate cake for whatever cream cake versions that you might be looking at. This recipe is THAT simple and versatile! 


I have to admit that what really attracted me to this cake recipe at first wasn't the rich ingredients or sweet & savoury taste of the cake, or even how simple the baking techniques were. What caught my attention were how pretty the cakes looked with the perfect wavy patterns at the side. Hah! I know! Pretty lame of me, isn't it? But then again, tell me who isn't attracted to pretty little sights like these. 


The original recipe call for the use of a 8" square pan and because I did not have one, I did my own version of the cake in a 9" pan. This resulted in my cake being kind of short but then again, no worries at all. The taste was not affected a single bit. The rich chocolatey taste was just splendid. Personally, I really like the soft, springy texture of the cake and it definitely goes well with a cup of my favourite Earl Grey Tea. 


These cakes can be easily stored in an air-tight container outside for 2 days but for any longer period of time, I would recommend leaving them in the fridge. You just need to let the cakes come to room temperature before serving and they will still taste as good!


I simply love these easy-bake, easy-storage recipes! They allow me to fix up my hubby's breakfast in a breeze. No fuss at all. And what's better, I can also share the love around by packing some for my family & friends. Love it!


If you are worried about the extra calories, oh come on! Just a tiny winy piece of it wouldn't hurt, would it?


***************
Recipe: Adapted & modified from here.

Ingredients
Chocolate Cake
250g salted butter, softened at room temperature
150g sugar
4 eggs
1 tsp vanilla extract
5 tbsp whipping cream
200g (minus 4 tbsp) self raising flour, sifted
4 tbsp cocoa powder, sifted

Cheesecake Filling
250g cream cheese, softened at room temperature
50g sugar
1 egg
1 tbsp corn flour

Method
Cheesecake Filling
1. Preheat oven to 160 deg C.

2. Grease baking pan (I used 9"square pan, for better height of the cake, use a 8" square pan or 9" round pan) by spraying a layer of non-stick spray around the base and side of pan before lining with baking paper. Set aside for later use.

3. Using a mixer, cream the cream cheese together with sugar, egg and corn flour. Make sure the mixture is well mixed. Set aside for later use.

Chocolate Cake
1. Using a mixer, set it to high speed and cream the butter and sugar together until you get a white and flurry mixture. This should take 5 to 7 minutes.

2. Add in the eggs (one at a time), vanilla extract and whipping cream to the mixture and mix well.

3. Fold in the sifted flour and cocoa powder to the mixture and make sure they are well incorporated.

4. Pour half of the chocolate cake batter into baking pan. Shake / tap the baking pan on the tabletop lightly so as to ensure that the batter is evenly spread and any air pockets within it are removed.

5. Using a spoon or a spatula, spoon in the cheesecake filling over the chocolate batter carefully. Spread the cheesecake filling over the chocolate battter and smoothen it out.

6. Spoon in the remaining chocolate batter over the cheesecake filling. Shake / tap the baking pan on the tabletop lightly again to remove any remaining air pockets in the batter.

7. Bake in the oven for 55 - 75 minutes or until your cake tester come out clean when inserted in the centre of the cake. 

8. Remove from the oven and allow the cake to cool in the baking pan for 5-10mins, before transferring it to the wire rack to be cooled completely.


Wednesday, 17 December 2014

#24 - Salted Caramel Cheesecake with Macadamia Nuts

Yum

Qns: Name one dessert that your hubby is nagging / pleading / demanding you to make for him for the past months! 

Ans: CHEESECAKE! 

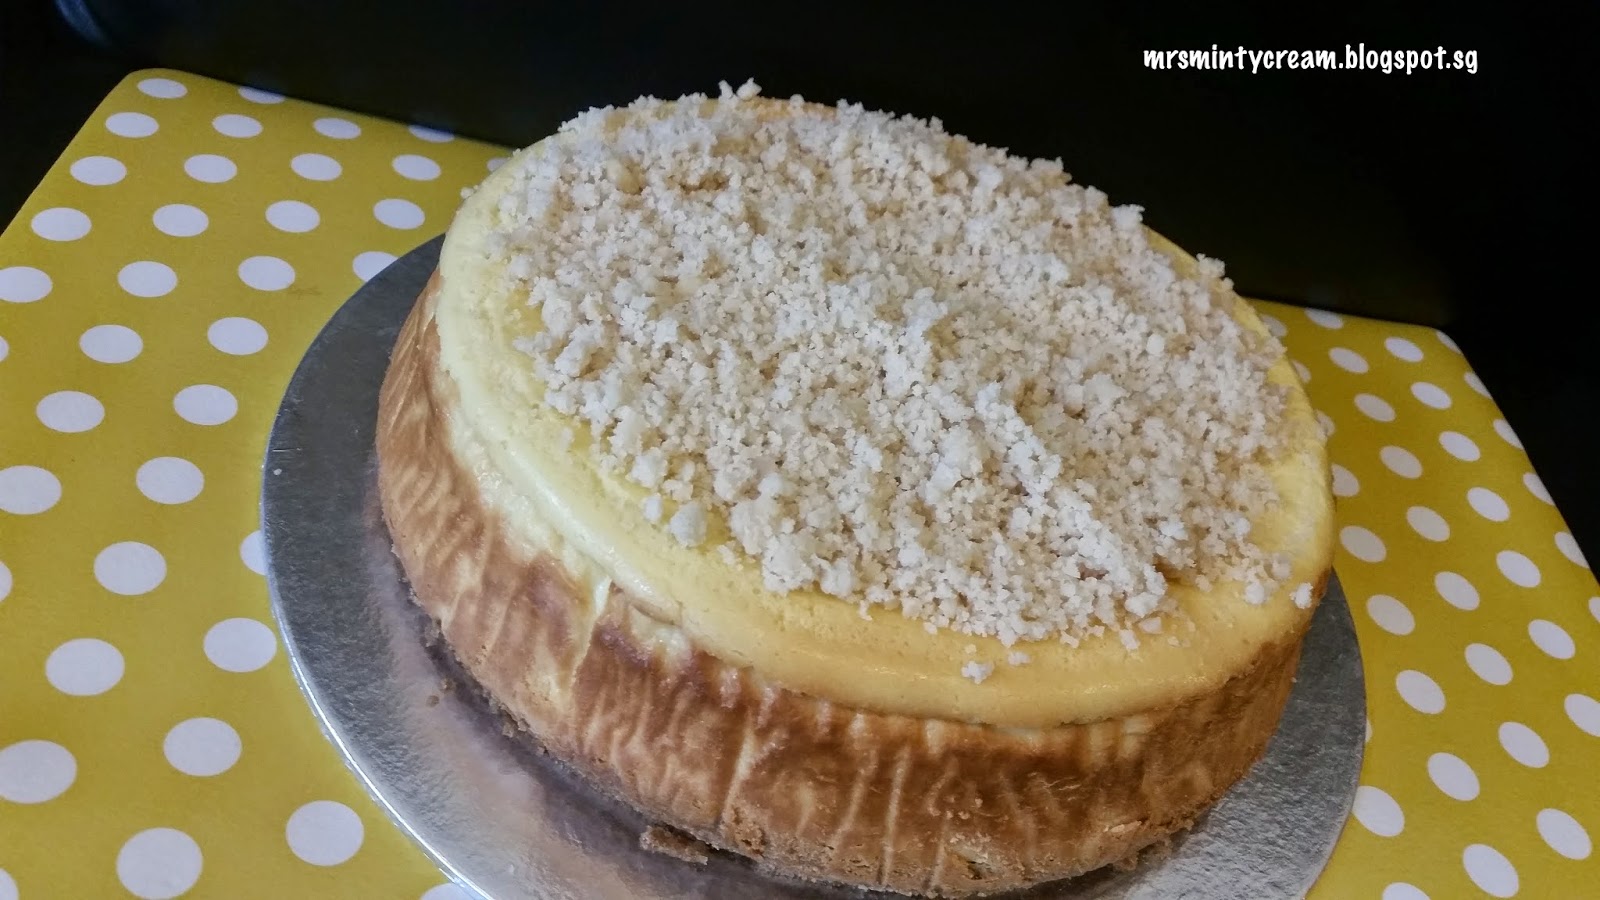
The last time I baked a cheesecake was more than a year ago and since then, my mister at home has never failed to remind me how much he is in love with my baked cheesecake and how rarely I bake for him lately. To be honest, he is not wrong. So, after our recent trip to Club Med Bintan, I decided to be nice to him and just let him indulge in the 1kg worth of cream cheese in this new recipe I have tried out - Salted Caramel Cheese with Macadamia Nuts. 

Compared to my previous recipe for Baked Cheesecake with Kiwi Topping, I did some minor changes to the proportion and it still taste as good as before! In my opinion, the magic was in the addition of the sour cream! It really helps in giving the cheesecake a tangy taste to it. 

In fact, the Baked Cheesecake was looking really good when I got it out of the oven. And then, (I blame it on my own impatience) due to the fact that I did not leave it long enough in the oven to cool off before transferring it to tabletop to cool completely, it results in a horrible looking crack right at the centre of the cheesecake. So indeed, patience is a virtue. Lesson learned. 


What I did next was to quickly fix the crack on the cheesecake with help from the following YouTube video, before sending it to the fridge to be cooled further. 


After staying in the fridge for 6 hours, the cheesecake turned out really well! To top it off, I crushed some macadamia cuts and sprinkle them over the top of the cheesecake before drizzling the cake with some salted caramel sauce. Yummy! 


The cake was creamy, yet tangy and the caramel sauce was sweet yet salty. Not to mention, my hubby is in love with the buttery biscuit base of the cheesecake and me, with the nutty macadamia nuts topping. Go give this recipe a try and share it with me! 


***************
Recipe: Adapted & modified from here.

Servings
Make approximately 8 - 12 pieces

Ingredients
Biscuit Base
2 cups digestive biscuits, crushed
120g unsalted butter, melted

Cheesecake Filling
1000g cream cheese, softened at room temperature
1 cup sugar
4 eggs
3/4 cup sour cream
1/4 cup all-purpose flour, sifted
1/2 tsp salt, sifted
1 tsp vanilla extract
zest from 1 lemon
juice from 1/2 lemon

Salted Caramel Sauce
1/2 cup brown sugar
1/4 cup heavy cream, room temperature
2 tbsp unsalted butter, softened at room temperature
1/2 tsp vanilla extract
1 tsp salt

Topping
100g macadamia nuts, crushed


Method
Biscuit Base
1. Preheat oven to 160 deg C.

2. Grease baking pan (Medium spring form cake pan, diameter 23cm) by spraying a layer of non-stick spray around the base and side of pan before lining the base and side with baking paper. Also line the base with aluminium foil on the outside. Set aside for later use.

3. To prepare the digestive biscuits crumbs for base & macadamia nuts for topping, you may either break up the biscuits / nuts into crumbs using a food processor or place them in a zip lock bag and break them up to crumbs by rolling a rolling pin over them in the bag. Set aside the crushed biscuits and macadamia nuts separately for later use.

4. Add in the melted butter to the crushed biscuits and mix well. The mixture should look like wet sand.

5. Pour the biscuit mixture into cake pan and pressed it firmly and evenly in the pan. I make use of the base of a ramekin to help me achieve an even layer. Bake for 8 minutes in the centre of the oven and set aside while making the cheesecake filling. 

Cheesecake Filling
1. Using a mixer, cream the cream cheese with sugar to ensure a good mix. Add eggs, sour cream, flour, salt and vanilla extract into the mixture and mix until smooth. 

2. Add in the lemon zest and lemon juice to the mixture and mix well. Once there are no more lumps in the mixture, you may stop mixing. Do not over mix so as to prevent cracks on the cheesecake. 

3. Pour the cream cheese mixture over the biscuit base. Shake / tap the cake pan on the tabletop lightly so as to ensure that the filling is evenly spread and any air pockets within the mixture are removed.

4. Bake in the oven for 1 hour. Leave the cheesecake in the oven to cool for an hour with the door ajar.

5. Remove from the oven and cool it completely on table top (I cooled it for 6 hours) before transferring the cheesecake to the fridge to chill for at least 4 hours. 

Salted Caramel Sauce / Topping
1. Using the double boiler method, heat up the brown sugar, heavy cream, unsalted butter, vanilla extract and salt. Keep stirring until the brown sugar is completely dissolved. The mixture should be gooey.


2. Before serving, sprinkle the top of the cheesecake with the crushed macadamia nuts and drizzle each slice of the cheesecake with the salted caramel sauce. 


Saturday, 28 September 2013

#11 - Baked Cheesecake with Kiwi Topping

Yum

By far, this has got to be my favourite dessert among all the rest of the recipes which I have adapted and modified. I would say that it is also the most successful and tasty one as well. Yeah! I was (still am) so happy when the cheesecake came out PERFECT after hours of setting on the tabletop & fridge. Heavenly! 

The texture and taste of this baked cheesecake is very similar to those New Yoke Cheesecakes which are available around coffee places and cafes. I like the creamy, cheesy, lemony taste of the filling as well as the buttery and slightly salty biscuit base at the bottom. In just one day, 3 quarter of the cake is gone! Hubby prefer the plain cheesecake while I liked mine with the kiwi toppings. Fresh and slightly acidic, the kiwi gave a perfect punch to the flavour of the cheesecake. You can even bite into the small bits of kiwi pieces in the topping. Love it love it love it!

***************
Recipe: Adapted & modified from here.

Servings
Make approximately 12 pieces

Ingredients
Base
1 and 1/4 Cup Digestive Biscuits Crumbs
85g Unsalted Butter, melted

Filling
1135g Cream Cheese, softened at room temperature
1 Cup Sugar
4 Eggs
3/4 Cup Sour Cream
1/4 Cup All Purpose Flour, sifted
1/2 Tsp Salt
1 Tsp Vanilla Extract
Zest from 1 Lemon
Juice from 1/2 Lemon

Kiwi Topping
2 Golden Kiwifruit
2 Green Kiwifruit
50g Fine Sugar

Directions
1. Preheat oven to 160C.

2. Grease baking pan (Medium spring form cake pan, diameter 22cm) by spraying a layer of non-stick spray on it before lining the base with aluminium foil on the outside. Set aside for later use.

3. To prepare the digestive biscuits crumbs, you may either break up the biscuits into crumbs using a food processor or place them in a zip lock bag and break them up to crumbs by rolling a rolling pin over the biscuits in the bag. 

4. Add melted butter to the crumbs and mix well. Pour the biscuit mixture into cake pan and pressed it firmly and evenly in the pan. You may make use of the base of a ramekin to help you. Bake for 8 minutes in the centre of the oven and set aside while making the cheese filling. 

5. Cream the cream cheese with sugar to ensure a good mix. Add eggs, sour cream, flour, salt and vanilla extract into the mixture and mix until smooth. 

6. Add lemon zest and lemon juice to the mixture and mix well. Once there are no lumps in the mixture, you may stop mixing. Do not over mix so as to prevent cracks on the cheesecake. 

7. Pour filling over the biscuit base. Shake the cake pan slightly to ensure that the filling is evenly spread and any air pockets within the mixture are removed.

8. Bake in the oven for 1 hour 10 minutes. 

9. When out of the oven, cool completely on table top (I cooled it for 4 to 5 hours) before transferring the cheesecake to the fridge to chill overnight. 

10. Blend the kiwi to a pureed. Place the pureed kiwi in a saucepan and sugar to it. Heat the mixture under low flame until the sugar is dissolved. Drizzle the kiwi topping on the cheesecake before serving. 

#Note - 
Baking the cheesecake for 1 hour 10 minutes, the top of my cake is a little too brown. You may adjust the timing to bake for an hour. It should give a better colour. 
Related Posts Plugin for WordPress, Blogger...