Showing posts with label Cheese. Show all posts

Saturday, 29 August 2015

#41 - Cheesy Corn Pull-Apart Bread

Yum

I have always wanted to own a breadmaker at home since I first started out in the kitchen. However, due to space constraint and fear of it being a white elephant, I was hesitant for a long period of time. But just last week, with much anticipation, I finally made the decision to purchase one and here I am, my first homemade bread product! 

Upon receiving the breadmaker, I was all excited to start making my own homemade bread. You have no idea how happy I was when the friends with whom I shared the bread with, simply love it! Of course, there are still plenty of room for improvement but I am so looking forward to trying out different bread recipes and making sure my house is filled with the fresh & sweet aroma of homebaked bread!


In this recipe, the combination of fresh corn kernels with parmesan cheese, along with a honey glaze on the top, gives you that sweet and salty balanced taste. The dough was kneaded by breadmaker before it was shaped and finished off with oven baking to yield a nice brown colour. Enjoy :)

***************

Recipe: Adapted & modified from My Mind Patch.

Servings
9 buns

Ingredients
Bread Dough
130g Corn Kernels, steamed (divided into 2 portions of 90g & 40g respectively)
80g Milk
20g Condensed Milk
40g Caster Sugar
1/4 tsp Salt
35g Egg, beaten
30g Salted Butter
130g Bread Flour, sifted
20g Cake Flour, sifted
3/4 tsp Instant Dry Yeast


Topping
75g Shredded Parmesan Cheese

Glaze
Beaten Egg
1 tbsp Honey, mixed with 1 tsp Hot Water


Method
1. Grease baking pan (I used 9"square pan, for better height of the buns, use a 7" or 8" square pan) by spraying a layer of non-stick spray around the base and side of pan before lining with baking paper. Set aside for later use.

2. Using fresh corn, collect corn kennels from corn cob and steamed at high heat for 15 minutes.


3. After corn kernels are slightly cooled, blend it (90g) with milk using a food processor or a blender. Make sure the mixture is well blended.


4. Pour corn mixture into a bowl. Add in remaining corn kernels (40g) and condensed milk. Make sure the combined mixture is well mixed.

5. Pour corn mixture into the bread barrel.

6. At each corner of the bread barrel, add in sugar, salt, beaten egg and butter.


7. Add in the bread flour and cake flour on top of the wet ingredients. Make sure the wet ingredients are well covered by the flour.

8. In the centre of the flour heap, dig a hole and add in the instant dry yeast.


9. Secure bread barrel in the bread machine.


10. Select "Knead Dough" function on your bread maker, and press "Start" (On my Donlim T15A Breadmaker, I selected function "9" and for 10 minutes - would suggest increasing kneading time to 20 minutes instead to yield a softer & fluffier bread texture).

11. When dough is ready, sprinkle some bread flour over the top of the dough and transfer it from bread barrel to a well-floured work surface.

12. Flatten the dough lightly to release the trapped air within the dough.

13. Divide the dough into 9 equal portions, about 63g to 65g each.

14. Lightly sprinkle each portion with some flour and roll it within your palms into a round ball. Place the dough buns into prepared baking pan.


15. Lightly spray some water over the dough buns before placing baking pan in a closed oven ("OFF" mode) to allow proofing of the dough for 90 minutes or when dough has risen to 1.5 times.


16.  After proofing, remove baking pan from oven. Preheat oven to 170C.


17. On the dough buns, brush a layer of beaten egg before placing the shredded cheese over the top.


18. Bake for 20 - 22 minutes, or until the cheese is partially melted & browned.


19. When bread is ready, removed from oven and apply layer of honey glaze on top immediately.

20. Allow bread to cool slightly and serve bread while it is still warm. 


Friday, 5 June 2015

#37 - Cheesy Chicken Baked Rice

Yum

Cheesy Chicken Baked Rice, definitely a go-to recipe for me and my family. Hubby and I love this dish so much that it is probably the most cooked dinner item for us at home. This is also something I like to cook for Hubby when I know he had a tough week at work. The perfect reward for him just because I know how much he love this baked rice! Trust me, this dish is THAT simple and THAT good!

To be honest, there is really no ways you can get this recipe wrong in the kitchen. I have cooked this dish numerous times for family gatherings, home dinners, pot-luck parties and even taught a few friends how to cook it. So far, every single person who have tried this, love it and they always come back, looking for more. I am so grateful to have this fool-proof recipe! 


I have a similar recipe on Chicken & Mushroom Baked Rice which I shared on this site couple of years back and this new version is basically an improved version with more vegetables. Even so, it still comes with the same old goodness packed in it. If you would like to, you may also replaced the protein in the recipe with salmon, grilled fish, pork, seafood or basically anything to your liking.

On that note, I will be doing a vegetarian version very soon. Stay tuned! 


***************

Recipe: Adapted & modified from here.

Servings
Serves 3 - 4

Ingredients
1 and 1/2 cup uncooked rice
1 and 1/2 cup of water (to cook the rice)
2 tbs Olive oil
90g Swiss Brown Mushroom, sliced
170g Chicken Fillet, cubed
50g Baby Carrots, cubed
50g Cherry Tomatoes, cubes
50g Mixed Vegetables
Salt & Black Pepper, to taste
1 can Campbell's Cream of Mushroom Soup
150g Shredded Cheese (Mozzarella, Cheddar, Parmesan)


Directions

1. Preheat oven at 200C.

2. Rinse and drained the uncooked rice. Set aside for later use. 

3. In a saucepan, add the olive oil. Once the saucepan is heated, add in the sliced mushroom followed by the chicken pieces. Stir-fry over medium-low heat until the chicken is semi-cooked with a white surface. Do not overcook the chicken to ensure that the meat will not end up too tough. 


4. Add the washed uncooked rice, followed by the carrots, tomatoes and mixed vegetables into the saucepan and continue frying and tossing. Season the mixture with salt and pepper. Ensure that the content is well-stirred.


5. Transfer the fried rice into a rice cooker and add in water to cook the rice.


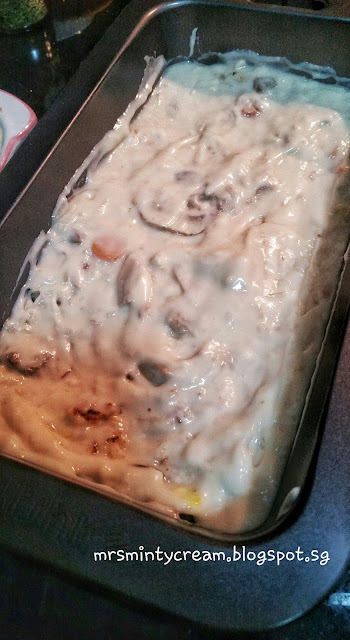
6. After the rice is cooked, portion the content into your casserole dishes or baking pan. Pour the Cream of Mushroom Soup sauce over the top of the rice. Spread the sauce evenly across the surface.


7. Top the sauce with a layer of shredded cheese.


8. Bake in the oven for 16 - 18 minutes, or until the cheese has melted and give a golden brown crust at the top of the baked rice. Serve while it is hot. 


Thursday, 21 May 2015

#35 - BEC Burger

Yum

I just made this yummy BEC Burger for my hubby this morning and he enjoyed it very much!

Bacon, egg and cheese burger (BEC Burger) is a popular breakfast choice in the United States. Instead of burger bun, it is also commonly assembled in a sandwich form or with a different choice of bread.

Many variations of this burger/sandwich also exist by substituting the choice of poultry (bacon / sausage / ham), choice of cheese (Swiss / cheddar) or even changing the ways of making the eggs (fried / scrambled). A pretty versatile item I would say.


This is definitely one breakfast item that I make pretty often and I especially turn to this recipe when my pantry is running low on supplies. The components needed are few and pretty basic in my opinion and that's a good thing! 


For my version of the BEC Burger, I like my burger bun to be buttery and toasted, and other than bacon, egg and cheese, I also like to add a little bit of Japanese Mayonnaise to it so as to provide a stronger flavour. If I have more components with me, I would also caramelised some onions or throw in some butter head lettuce to add more texture and crunch to the burger. If you ask me, with all the butter, bacon and cheese that go into this burger, it may not be the healthiest burger. But it goes without saying that this burger is good for either breakfast or brunch and is really satisfying in terms of its flavour!  

As with most sandwich / burger, this BEC Burger is best when served hot. 


***************

Serving
1

Ingredients
Burger Bun
Butter
Cheddar Cheese
Egg
Back Bacon
Japanese Mayonnaise 
Salt & Pepper, to taste
Parsley
Paprika


Method
1. Slice a hamburger bun into half, coat each side with some butter.


2. On one half of the bun, top with a slice of cheddar cheese and toast the two halves in an oven / air fryer. I used the air fryer and toasted both halves of the bun (with cheese on one of them) at 180C for 3-5mins. Keep an eye on the cheese slice. Once it has melted, removed toasted bun from the oven/air fryer. You should get a lightly brown crisp burger bun.

3. Using a saucepan over medium heat, fry the egg (sunny side up or over-easy, according to your desired preference). Season with salt, pepper, parsley and paprika. 


4. While that is being done, cook the bacon in the same saucepan until it crisp up. 


5. Remove egg and bacon from pan and you are ready to assemble the burger in your preferred order. My version - Bottom buttery toasted bun with melted cheese followed by cooked back bacon, top with sunny-side-up egg and a touch of Japanese Mayonnaise before the top buttery toasted bun. 


Monday, 30 March 2015

#33 - Broccoli & Cheese Mashed Potatoes

Yum

Mashed potatoes, a very common side dish regardless of the main course you are serving for dinner. It goes pretty well with your steak or pork/chicken chops and is not exactly that difficult to prepare. You can even get them ready way ahead of time and just heat them up in the oven before serving.

In this recipe, I have added broccoli & cheese to enhance the taste of the mashed potatoes. In that way, I don't have to worry about my mashed potatoes being tasteless. It is so flavourful and healthy at the same time! Yummy! 

***************

Recipe: Adapted and modified from here

Servings
2 - 3 person

Ingredients
4 Small Potatoes, peeled & halved
1 small head Broccoli
1 cup Milk
2 tbsp Salted Butter
1 and 1/2 cup Shredded Cheese
1/2 cup Bacon Bits
Salt & Pepper, to taste


Directions
1. In a large pot, add the potatoes, making sure that they are covered with water. Bring to a boil over high heat.


2. Once the water starts to boil, reduce heat to medium-low and cook the potatoes for another 10 minutes.

3. While waiting for the potatoes, trim and chop broccoli into small dices.

4. Add broccoli to potatoes and cook them until both are tender (about 5 more minutes).


5. Drain off water from the pot. Using a potato masher, make sure potatoes and broccoli are well mashed.

6. Stir in milk, butter, cheese and bacon bits and continue mashing until cheese is melted.


7. Season with salt & pepper before serving.


Sunday, 22 March 2015

#31 - Cheesy Garlic & Brown Sugar Pork Chops

Yum


Pork chop has never been an item which I will order for at any restaurant or eatery. Reason being, it sounds like a pretty plain and boring dish to me. I would rather go for a healthy yet yummy baked salmon, or even a hearty portion of lamb chop instead.

However, when I came across this recipe on Cheesy Garlic & Brown Sugar Pork Chops, my eyes lit up! The word CHEESY definitely caught my attention. I just have to give this recipe a try! 


Anyway, I would also like to share on this quick method of defrosting your meat. It work perfectly well for my pork chops. It took me 10 minutes and I was really pleased. Click here for details and give it a try.


***************


Recipe: Adapted and modified from here

Ingredients
Dry Rub Mixture
1 tbsp Mixed Herbs (include Basil, Thyme, Rosemary, Oregano, Fennel)
2 tbsp Garlic, minced
3 tbsp Brown Sugar
1 tsp Paprika
1/2 tsp Salt
1/2 tsp Pepper

4 Pork Chops
30 grams Butter, melted
1 Cup Shredded Cheese
1 tsp Parsley

Directions
1. Preheat oven to 180C. Line baking pan with baking paper.

2. For dry rub mixture, combine mixed herbs, minced garlic, brown sugar, paprika, salt and pepper in a large bowl. Mix well. 


3. Rub both sides of pork chops with dry rub mixture. 


4. Transfer pork chops on to baking pan.

5. Drizzle melted butter over the pork chops and bake in the oven for 20 minutes.


6. Remove from oven. Sprinkle cheese over the top of the pork chops. Bake for another 5 minutes until cheese has melted.


7. Sprinkle the top with parsley before serving. Enjoy. 


Related Posts Plugin for WordPress, Blogger...